Friction Logging Playbook + Template
Friction logging helps product teams identify UX issues that analytics miss. Learn how leading companies use it to improve conversions and user experience.


Your next steps to a smoother user experience
We've all had that moment. Months after a big launch, you find a seemingly small UX issue in your sign-up journey, and realize it's been quietly hurting your conversion rates. You thought you had all the analytics and tests in place, but you missed seeing the product the way your users do. One-off audits are helpful, but they don't catch the little paper cuts that pop up as your product grows and the issues that data dashboards don't catch.
This is where building a habit of friction logging for your digital product comes in.
It's easy to look at a "minor" UX issue and push it to the bottom of the backlog. But each small issue adds another papercut to your user's experience. Things like an extra click during onboarding might not seem like a big deal, but an extra click here and a piece of buried functionality there soon add up to multiple papercuts wounding your user experience and breaking the trust of your users.
A regular friction logging habit helps you spot these hidden problems. It shifts your team's conversations away from personal opinions and toward a shared understanding of what users are actually experiencing. When you systematically find and smooth out these rough edges, you end up with a product that doesn't just work, but feels easy and intuitive to use. That's how you build strong user retention and drive real growth.
You now have a framework for getting a friction logging practice started. The most important thing is to start small and be consistent. You don't need to wait for a big redesign or the "perfect" time.
Here's what you can do next:
- Schedule your first session: Block off 60 minutes on the calendar for sometime next week.
- Pick one user flow: Start with something critical, like onboarding or a core feature.
- Invite a small team: Get 3-5 people from different departments to join you.
Doing this manually is a great way to start, but as you grow, you might want a more efficient way to see your product through your users' eyes.
What is friction logging?
It's when you go through your own products as a user would and document every point where the experience feels confusing, slow, or frustrating. It's best practice to do this on some sort of frequency (monthly, bi-monthly or quarterly) so you can see how the experience improves over time.
Friction logging is tried and tested by some of the world's leading companies.
Leading email platform, Resend, has every new hire in their team complete a friction log to identify areas of improvement.
While world leading payments platform Stripe uses friction logging to improve their product experience and has even created a developer friction logging toolkit on GitHub.
This guide will walk you through setting up a simple, repeatable process that leads to a noticeably smoother user experience and healthier growth.
Step-by-step guide to Friction Logging
It's best to make friction logging a regular exercise. Here are a few tips for smooth sailing:
- A mix of people: Friction logging works best when it's a team effort. Try to pull in folks from all different teams like product, design, engineering, and customer success. New hires are particularly great as they have fresh eyes and haven't gotten used to the quirky workarounds the rest of us take for granted.
- A single user flow to focus on: Don't try to fix everything at once. Pick one important user journey to start with. Good candidates are usually things like new user sign up, user onboarding, inviting a teammate, or the checkout process.
- A place to take notes: This can be as simple as a shared Google Doc, Figjam/Canva or a Notion page. If you prefer something more structured, a tool like Jira or Linear is great for turning your findings into trackable tasks.
- An analytics tool (optional, but helpful): You can absolutely do this without any special tools. But if you have access to session replays or analytics they can help you decide which user flows need the most attention. Tools like Adora can even visualize the entire user journey automatically, making it much easier to spot where people are getting stuck without having to guess.
Completing your friction logging
Getting into a regular friction logging rhythm can shift your team's mindset from constantly putting out fires to proactively making the product better. Here are five steps to build a process that actually sticks.
Step 1: Pick a journey
Choose a high-impact journey that you should be regularly optimizing. Make sure you have access to demo environments that reflect the live customer experience. It's important not to complete the exercise on a staff account which may have unreleased features on it. You want to experience the customer journey as close to reality as possible.
Step 2: Go through the experience meticulously
You can fly solo on friction logging, doing it alone. But sometimes magic happens when you get different viewpoints in the same room. An engineer might notice a slight lag that a designer overlooks, while a customer success manager can tell you the three questions they always get about a certain step in onboarding.
To keep your sessions organized, assign these simple roles:
- The Friction Driver: This person shares their screen and goes through the user flow, pretending to be a user. The important part is that they think out loud. For example: "Okay, I'm trying to find the sign up button..." or "I thought clicking this would open a new tab, but it didn't."
- The Logger (Scribe): Have someone documenting the findings.
- Observers: Everyone else on the call watches the flow and chimes in with what they see. They might point out moments of confusion, frustration, or even delight. The goal is to share what you see, not jump to solutions.
It's a good idea to rotate these roles each time you meet. It keeps things interesting and helps everyone on the team develop more empathy for your users.
Step 3: Track your findings in a template
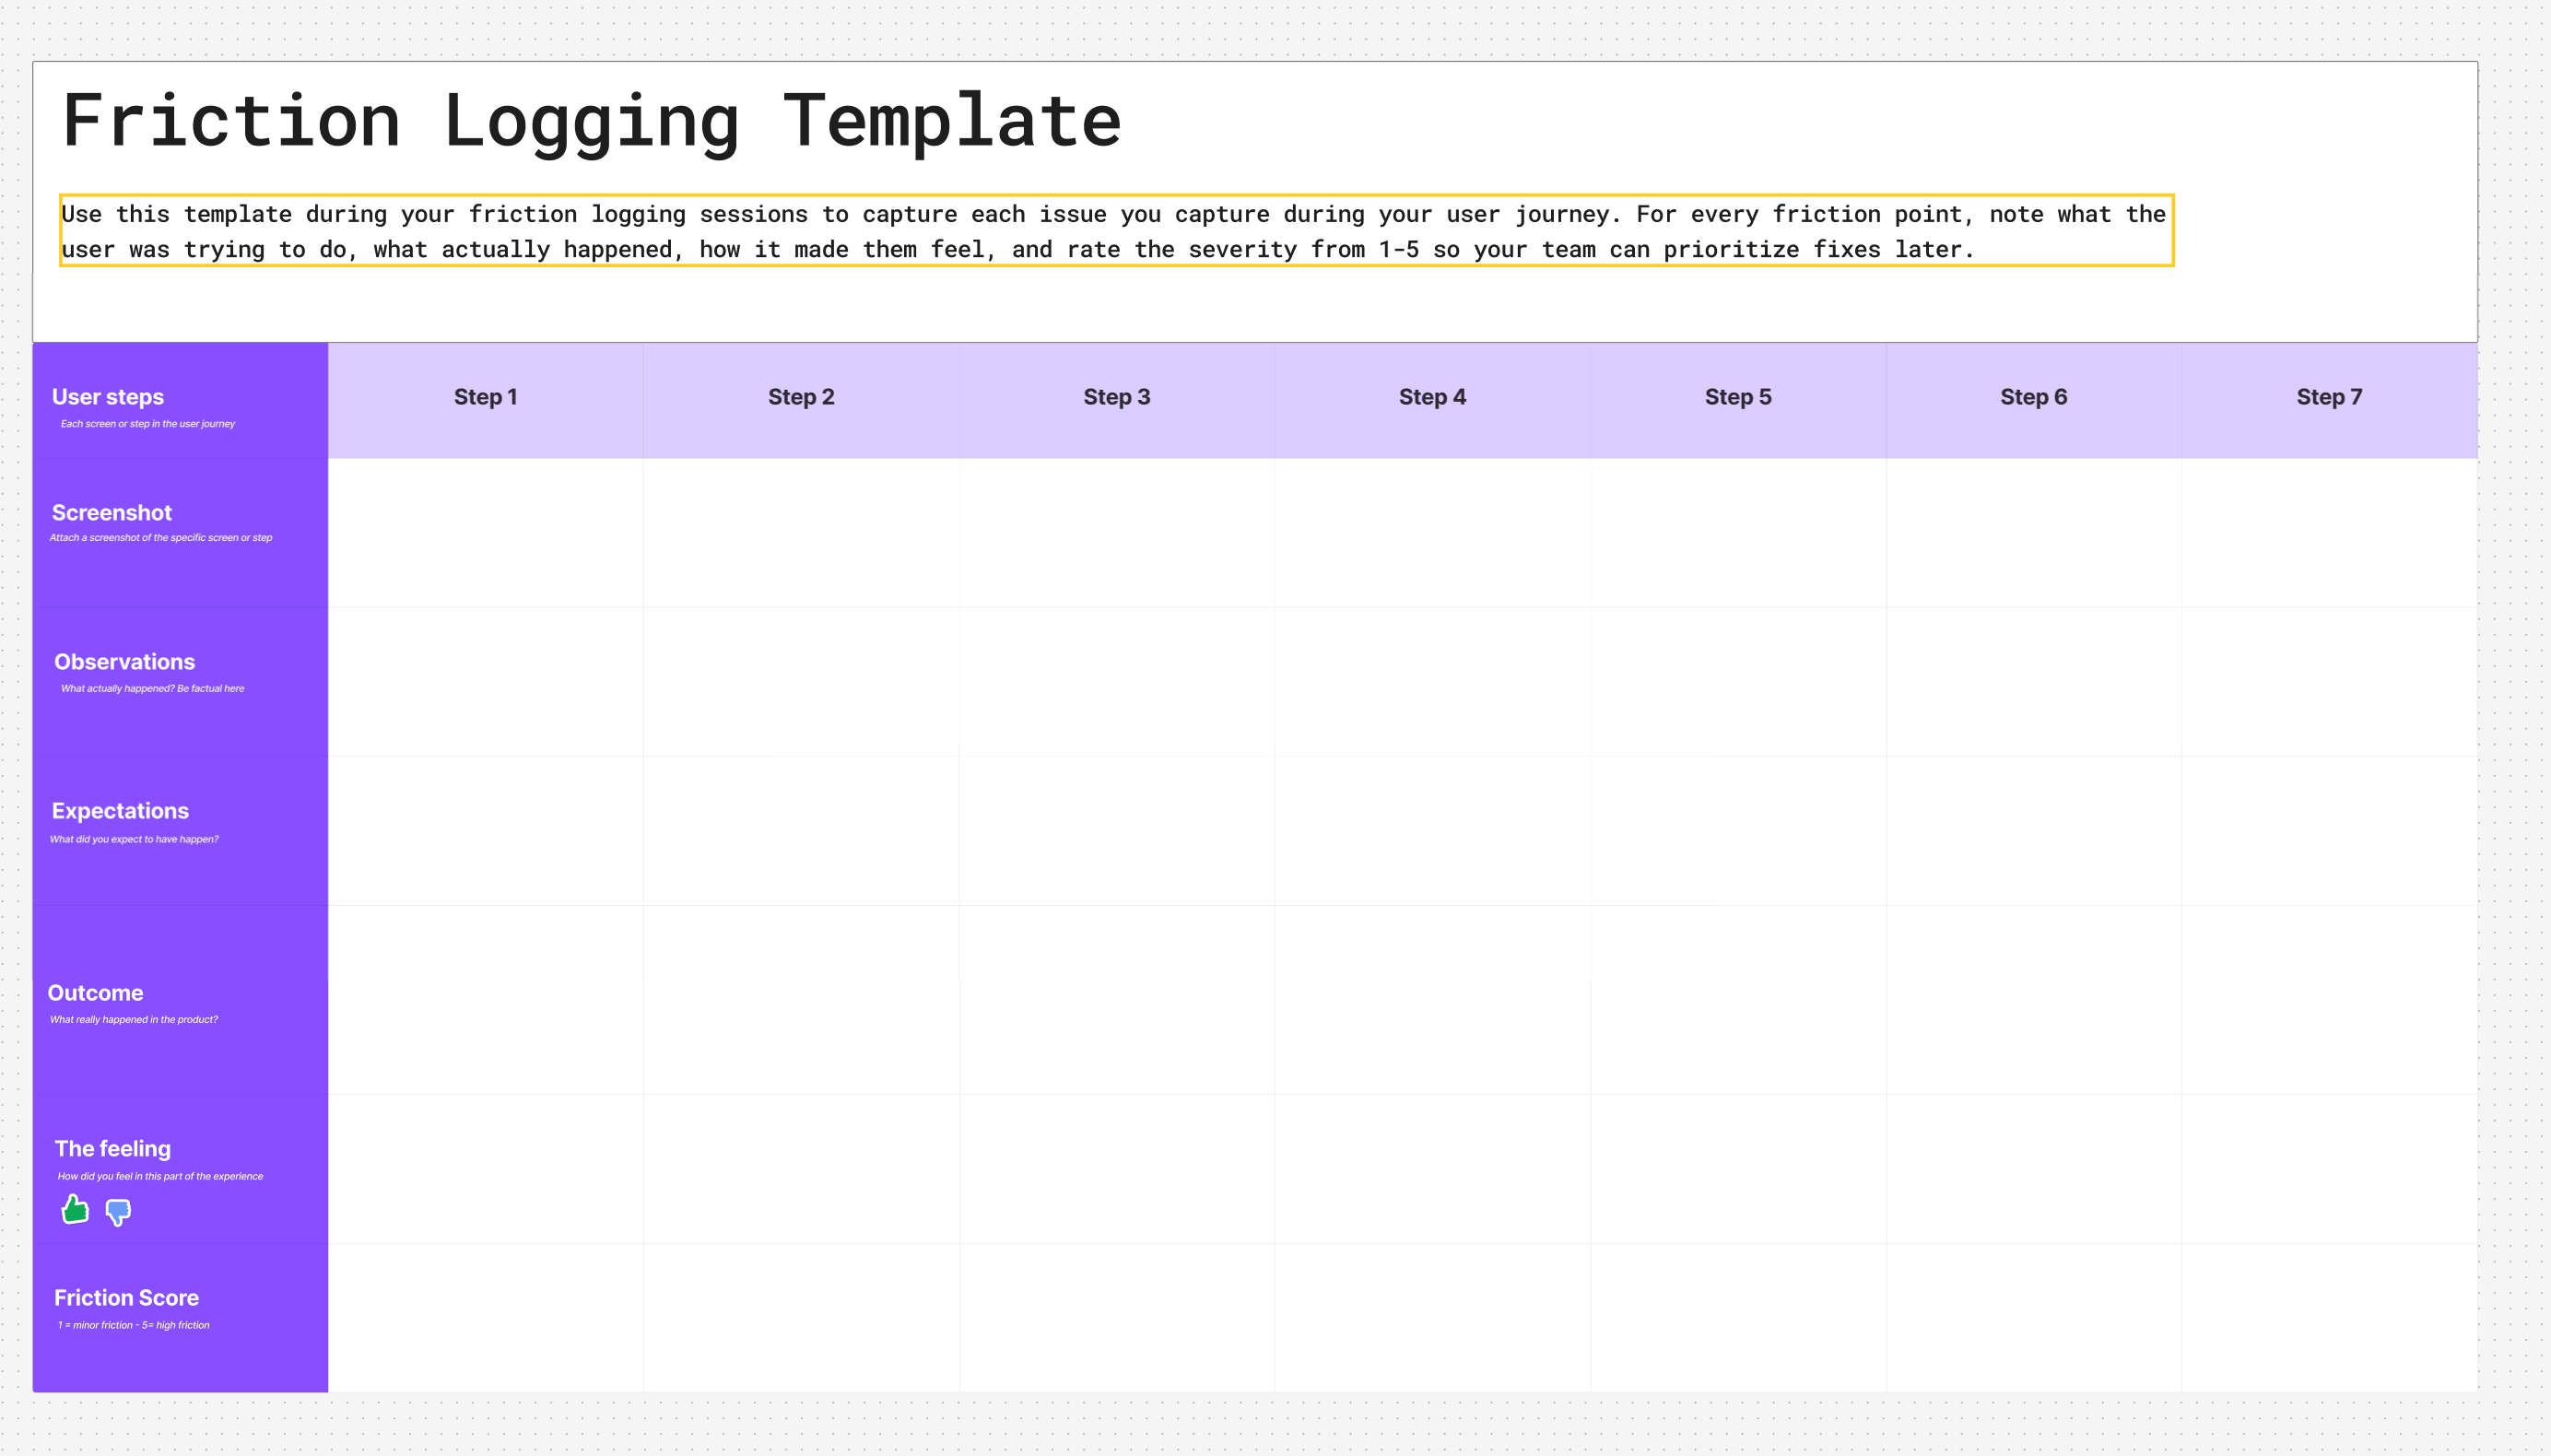
A good template keeps everyone on the same page and stops your notes from turning into a messy, unusable document. It also makes it easier to look back later and see if your changes actually helped. We've created a template to help you take the leap and start documenting. The key things to call out:
- The step: What was the user trying to do? (e.g., invite a teammate), include a screenshot of the step so people have visual context of each step of the journey.
- The observation: What actually happened? Be factual here.
Getting started with friction logging
Start your friction logging journey today using our Figma Template.
We hope you found this guide helpful 💜
Related posts

Why We Built AI Product Insights
The story behind Adora's AI Insights, and why I think this is the future of how product teams operate.

Data-driven off a cliff: why dashboards are dead
Dashboards are dead. Not because data doesn't matter. But because the way we've been accessing it was never actually built for the people making product decisions. Here's what went wrong, and what comes next.

SaaS Pricing Pages to Sign Up Journeys
This teardown analyzes SaaS pricing pages and their connected sign up journeys. Learn how leading SaaS companies design pricing, CTAs, and sign up flows that reduce friction and increase conversion.